
Whilst a picture may speak a thousand words, it can shout really loud if you combine it with words.

I love how a simple phrase when combined with a photograph can totally change the meaning of what you’re seeing – plus it’s useful if you’re trying to explain or point something out.
Using a tablet (or mouse) and your own penmanship
This will be a lot easier and slicker if you have a drawing tablet – there’s loads out there to choose from and they all seem pretty good to me – I have one of the Wacom Bamboo ones. Don’t be put off if you don’t have a drawing tablet though – you might feel a bit slow and clumsy using a mouse but it can be done.* If you get really stuck why not try using a handwriting font (see below).
- Open your photo – resize and do any tweaking that might be required – save this as a copy so you don’t accidentally scribble in a ‘forever’ way all over your lovely photo.
- Create a new layer, choose a suitable colour and brush – scribble around until you have just the right combination. The example below uses a 3px soft brush.
- Double check you’re on a separate layer and start writing!

*Tip for mouse users: try working at double the size you want your finished image to be – the downsizing will help smooth out jagged edges.
Using a font
- Open your photo – resize and do any tweaking that might be required.
- Create a new layer, select the ‘type’ tool, click on the image and start typing.
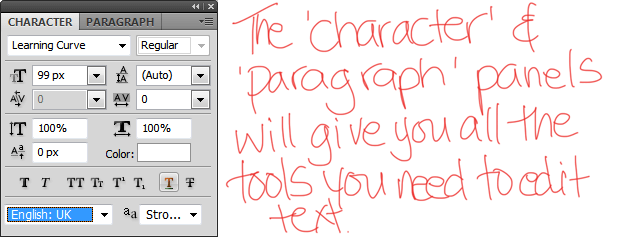
- Highlight the text with the text tool, then in the top navigation go to ‘Window’>’Character’ and choose your font, size, alignment etc
- Pick the colour you want to use from your swatches panel.


Some nice (and free) fonts to try:
Mobile apps
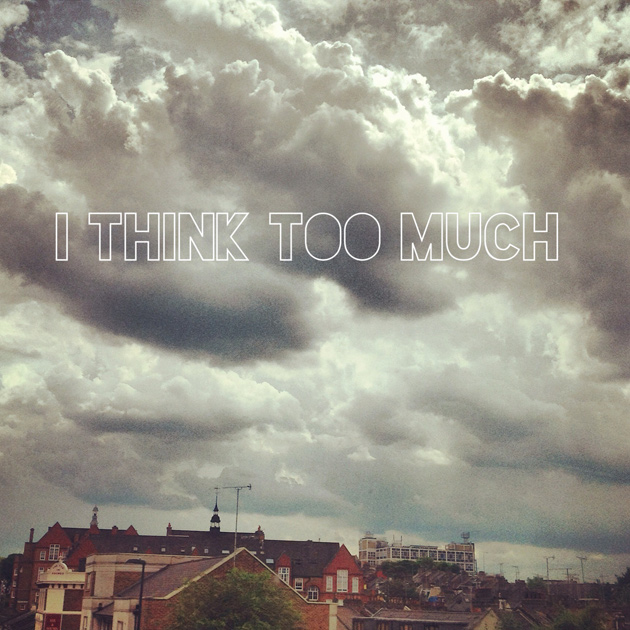
There are some fabulous apps out there that make it really easy to add text to a photo – the example below was created using ‘Over’ on my iPhone but all the smartphones seem to have something similar.
- iPhone/iPad: Over
- Windows phone: Photograffiti
- Android: PicSay
So there you go. Looking back I’m not sure this even needed a tutorial – it’s a pretty straightforward technique but a good way of rescuing a photo which might otherwise be a bit bleh.
How about you, do you like to scribble on your photos?

6 Comments
Amy
4 January 2013 at 09:52I totally want a drawing tablet now – is yours the best one?
Angie
6 January 2013 at 20:14Wacom do a few different ones in their Bamboo series – they all seem pretty good to me – I couldn’t see huge differences between them. Whichever you choose I hope you have fun with it!
Millie
6 January 2013 at 00:11Hi Angie! I have nominated you for The Versatile Blogger Award, Check It out here:http://polaroidsnpostcards.wordpress.com/2013/01/06/the-versatile-blogger-award/
Angie
6 January 2013 at 20:18Ooh, thanks Millie! I’m going to check this out right now 😀
Cass
7 January 2013 at 10:20Ooh! That “I think too much” picture is AMAZING! I love it. The clouds… Wow. Also, I’m still trying to figure out that light-leak effect you have in the Moo picture. I tried doing an orangey layer the other day, setting it to “screen”, hitting invert and then painting bits back in along the edge, but it just didn’t look right. In fact, it looked down-right silly. Ho-hum. I guess I shall just have to keep on gazing dreamily at your pictures instead.
Angie
9 January 2013 at 20:45I love instagramming clouds!
The light-leak tutorial is in the works – what you’re doing is almost there – I’ve added a few more steps though to help it along (no painting required).