Not quite colour, not quite black and white. The world of split-toning can add oodles of depth, interest and character to images that might otherwise not quite cut the mustard.
The origins of split-toning
Split-toning in the film photography world refers to a chemical process, usually with black and white photo printing, where processing starts off in the usual manner but is stopped short and finished off using different toning chemicals, for example gold. You are literally splitting the toning of the image between ‘black and white’ and ‘gold’.
If you’re into the whole chemically world of photo development and print here’s a great explanation.
Creating split-tone images with Adobe Lightroom
In its truest sense split-toning is done with black and white prints, so this is what we’ll need to start with. Try and get it spot-on in terms of contrast nice black-blacks and white-whites.
Illustrated below is a good starting point for getting a black and white image:
- go to the ‘develop’ mode
- under ‘basic’ pick ‘black & white’
- choose ‘auto’ for the toning
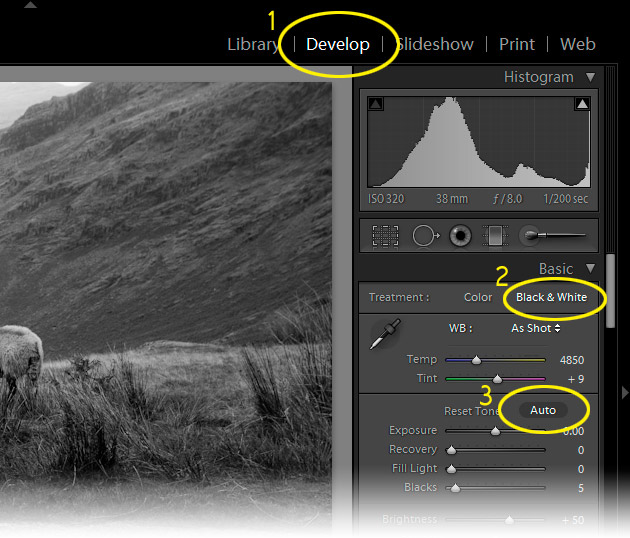
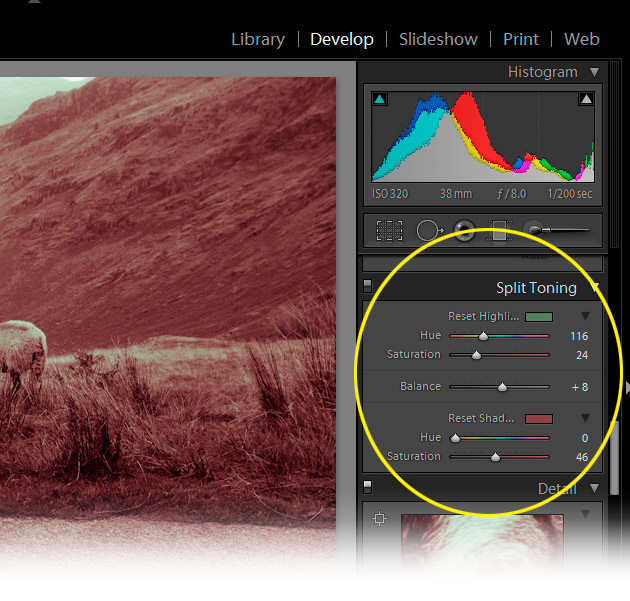
Once you have a great looking black and white image you can then apply the spilt toning:
- The best way to get started is to simply have a play and see what happens (even experienced darkroom technicians never really know what’s going to happen with split-toning until they actually do it).
- The top two sliders represent the highlights in the image and the bottom two the shadows – the more saturated the colour the more extreme the effect.
- The two colours can be near to each other in the colour spectrum (subtle) or opposite colours for more drama (as illustrated below).
- The ‘balance’ slider in the middle simply weights the ratio of colour for the highlights or shadows.
- None of these setting will effect the contrast of your image – you can adjust these at any time with the other develop tools though.
And because I am a bit addicted to creating Lightroom preset I have created some split tones for you to try in the safety and comfort of your own homes…
10 free split tone Lightroom Presets
Here’s what they all look like – the link to download them is at the end of the post.
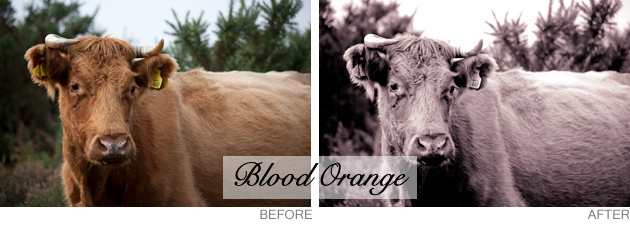
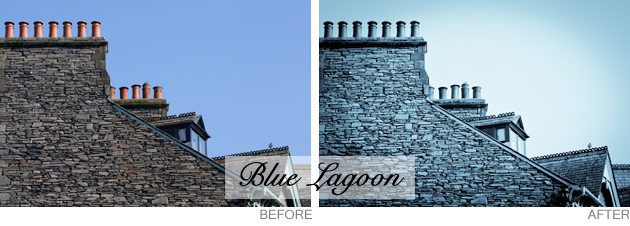
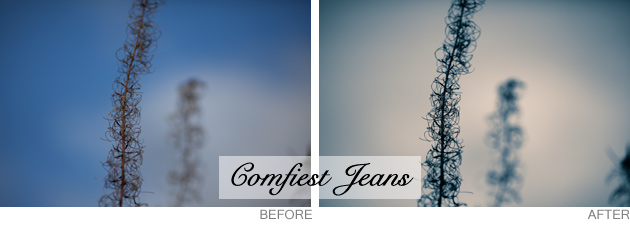
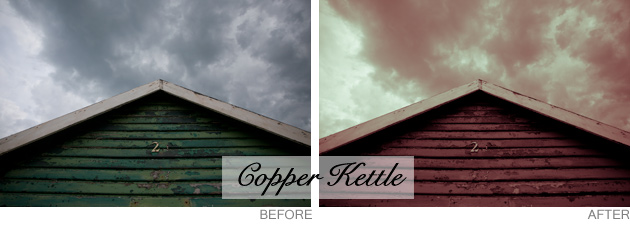
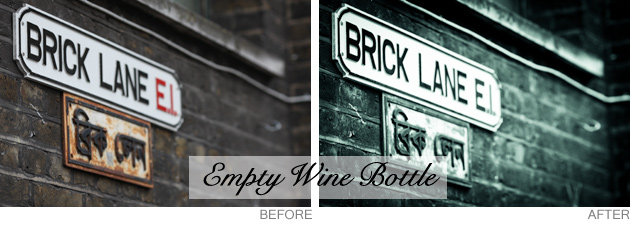
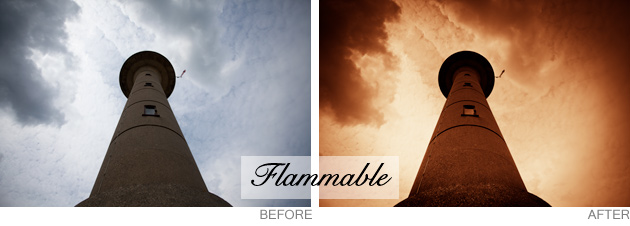
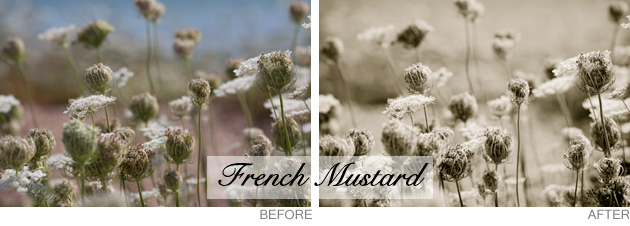
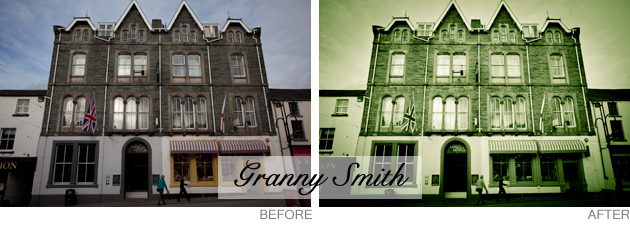

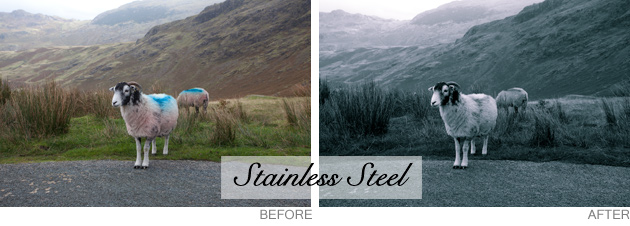
Remember – convert your image to B&W first before applying the preset (instructions included with download).
Enjoy!
[button size=”large” bgColor=”#6eb5c7″ link=”http://www.angiemuldowney.com/wp-content/uploads/2011/11/split-tone-presets.zip”]Download 10 FREE split toning presets[/button]

9 Comments
eva
5 November 2011 at 21:33ok, you’ve helped me make up my mind, i am definitely going to have to get lightroom!
Angie
5 November 2011 at 21:35Am I luring you in with all my presets? I don’t think you can go wrong with Lightroom!
Amit
11 November 2011 at 09:25Thanks Angie, this was very informative and made me finally use the presets you can see it at http://flic.kr/p/aDELrT
Also tanks for sharing the presets, it has given life to the pics which I never used to look at.
Angie
16 November 2011 at 00:33Your photos look great Amit, glad the presets were useful
Berthold
29 January 2012 at 16:08I feel like this should be feasible via layers in PS for those of us who have lower tool saturation. Have you tried?
Angie
30 January 2012 at 23:29Most things you can do in Lightroom you can also do in Photoshop, it’s just not always as straightforward – I found this tutorial which looks quite good… http://www.photoshopessentials.com/photo-effects/split-toning/ and I will investigate further!
Mark Woods
18 October 2013 at 00:33Ta from Wiltshire, England, Angie! I LOVE ’em!
Mark.
Angie
18 October 2013 at 20:42Awesome!
(And hello, Wiltshire)!
pinup presets
10 November 2013 at 07:35Wow, this article is fastidious, my younger sister is analyzing
such things, so I am going to convey her.